Monday 13 November 2017

November update


Carriage washing back in October.


Back to the DMU repairs at the height of the strip down.


A Rare Picture! Bob painting seats accompanied by Alistair.


 Replacing the ceiling panels.


The floor covering down.


Here the floor hatches have had the lino trimmed, the aluminium edges have been replaced and the seat frames are starting to be refitted.


 The finished saloon.


More Wagon Repairs

The weedkilling wagon has been in to have a handrail repaired and rope cleats fitted.


This wagon had two rails fitted to enable it to transport the jacker-packer more easily.


While all this was going on the RU had a trip into the daylight.


Thursday 5 October 2017

October 2017 update

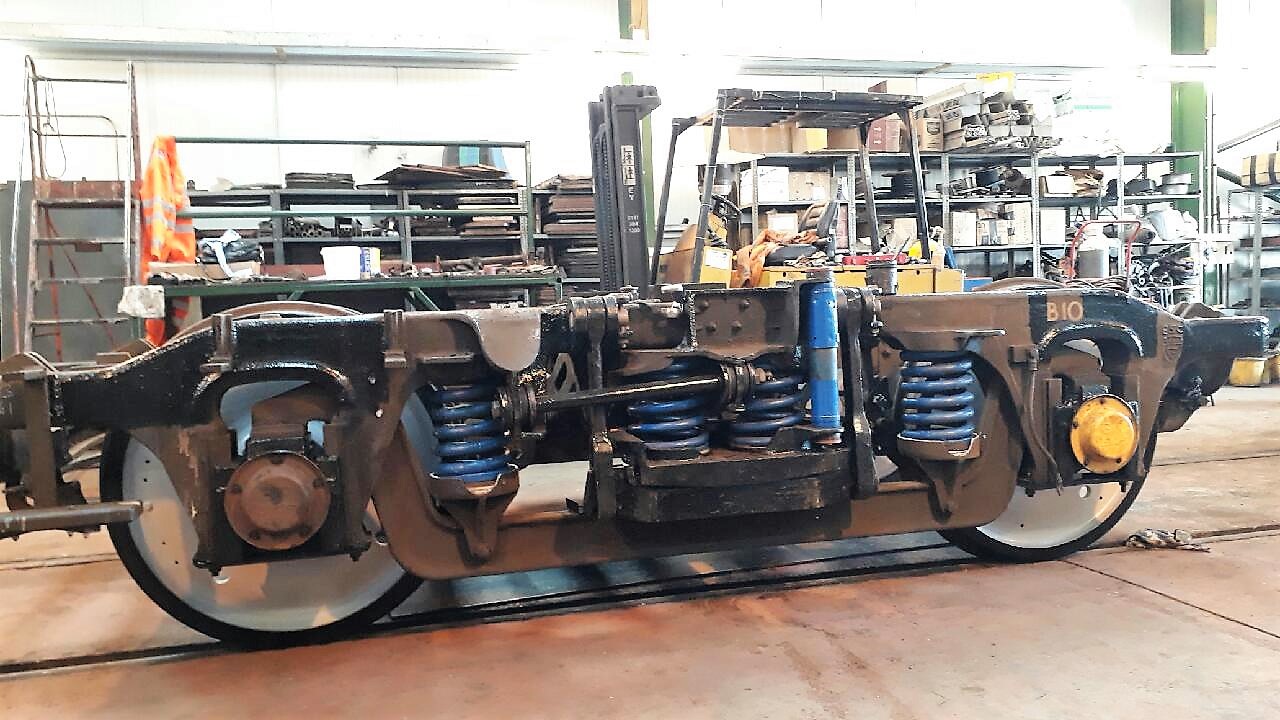
 Commonwealth bogie horn guides

One of the problems that we have had whilst renovating a commonwealth bogie, is the replacement of the horn guides.  The horn guides are two pieces of metal, bonded together by rubber.  The inner metal channel fits over the leg of the bogie frame and is welded into place.  The outer metal channel forms the guide in which the axle bearing housing is held.  Over time water gets between the bogie leg and the welded inner channel, rust forms which eventually pushes the outer channel onto the bearing housing.  This then traps the bearing housing in place, not allowing the suspension to perform its up and down movement properly.
When removing the old horn guide the welds have to be cut out, this tends to destroy the guide, meaning a new replacement has to be found.  At £250 each and eight to each bogie, its quite an expense.  They are also not available off the shelf and have to be specially made to order.
Alan has had past experience of rubber moulding and decided to set about making our own.  A new inner channel was made, with the old outer being cleaned up by shot blasting  and set aside for reuse.  Alan then made a mould and set about making the new guides.

Below is the completed guide, looking at the inner channel which fits over the bogie leg.


A view of the outer face on which the bearing housing slides.


A view from the top showing the bonding between the inner and outer channels.


Wagon repairs.

Sole wagon 742057 has been in for repairs to broken side and end doors.  Jack is putting new wooden beams into the end board.  The two centre hinge bands have been renewed.
 

A look of surprise as the camera catches both Jack and Bill by surprise.  The shark brake van is having the roof re-felted.


The end board completed.


The shark brake roof re-felting in progress.


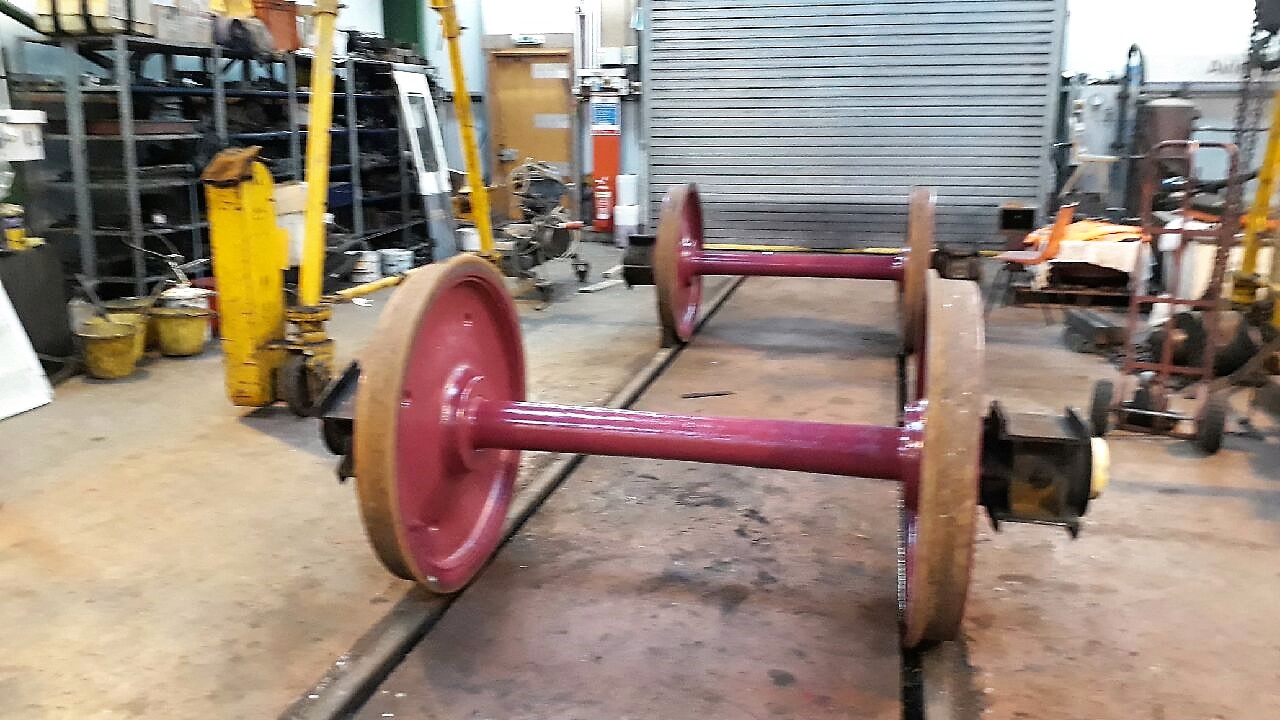
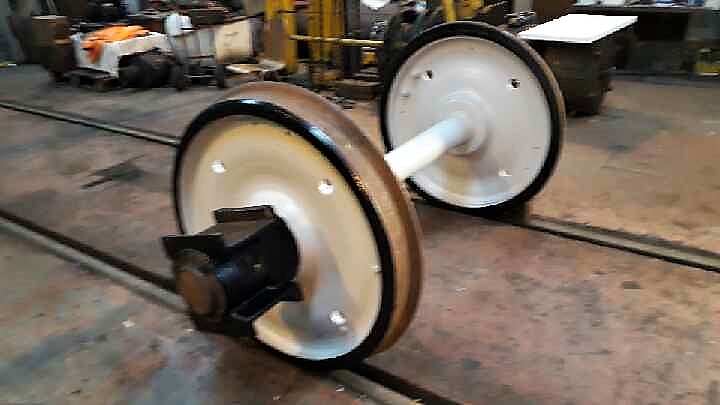
A pair of axles for a commonwealth bogie, having been cleaned, then painted with primer, undercoat and finally black gloss.


The shark brake bodywork is in a poor condition, however this will have to be put off until another time.


The side board of the sole wagon is now completed.


The re-felting of the roof of the shark brake van is now complete


Another view


The completed sole wagon repairs ready for paint.


Equipment repairs.

 Problems with the band saw resulted in the bearings having to be replaced in each of the three guide wheels.


Diesel Multiple unit repairs.

 One coach of the blue square groups DMU set is with us for attention.  Many of the doors were having door lock problems, which are receiving attention.


Having removed the striker plates, the wooden insert will have to be replaced and the bolt holes drilled out.  Here Jack is tapping a thread into the new hole.


Some of the hardboard roof panels have been damaged by water coming in through the vents and are being replaced.


The old lino floor covering has been removed as it was in bad condition and will be replaced.  In some places an aluminium patch had been screwed to the floor.  The edge of these holes are being rebated to take a plywood insert.


a patch in place.


Holes in the floor just behind the cab on each side require attention.


The other side.


A general view of the inside of the saloon.  Bill getting it ready for the new lino floor covering.


A view the other way into the small saloon.


Friday 1 September 2017

Commonwealth bogies

After the holiday break! well mine anyway!

Whilst I have been away the lads at the shed have been refurbishing a pair of commonwealth bogies.  Although these bogies are currently under the RU, they are destined to be used under the P-way departments BG mess vehicle.  The reason for this is that we have utilised four axles that have had their tyres re-profiled, resulting in the tyres now being under the minimum thickness.  The p-way BG is sitting on bogies that have very good tyres, with plenty of use left in them, hence they are required for the RU.  The undersized tyres will be perfectly good for the limited use that the p-way vehicle gets.

A commonwealth bogie minimum tyre thickness is 35mm and the wheels that we have used have a tyre thickness of 32 / 33mm.  The 35mm minimum is for a bogie which will run at 100 mph, so at our maximum speed of 25mph, 32/33mm is probably fine, however we work to the former British Railways standards for coach repairs.

The replacement axles pictured inside the shed, having been needle gunned cleaned and painted.  They are at the undercoat stage.


A Commonwealth bogie is fitted with roller bearings, as these axles have been standing outside for a long time the rollers needed cleaning, the grease needed replacing with new gaskets being fitted to the bearing caps.


A Willie Dodds paint special!  not so sure that white gloss is a good idea, however it certainly creates an effect,  Gloss black tyre rims to finish.


 Bogie number 10 completed.  This has been a huge learning curve for us, we have changed axles and horn guides before, but we have never changed the centre coil springs on the bolster. 


The bogie has six coil springs each side, the centre springs have an inner and an outer coil.  When it was dismantled, one of the inner coils was found to be broken, with the top and bottom mounting pads completely disintegrated.  A replacement spring was sourced, new neoprene pads made and the original steel discs cleaned up and painted.


Saturday 8 July 2017

Update 08th July 2017

Steady progress has been made on RU 1936.
Willie Dodds seen here working on one of the kitchen sliding doors.


This is the kitchen end buck-eye coupling.  It has been completely dismantled, cleaned and rebuilt using a new mounting pin and bushes.


A view of the former staff cloakroom, re-panelled, fitted with shelving and painted out.


A view to the left showing the new bulkhead where the former lockers were positioned.


Inside the kitchen further metal work was required.  This shows new "Z" framing and side panel patches in place.


The side corridor along the kitchen, almost complete with new, black painted mouldings over the panel joints.


The saloon end buck-eye has received the same treatment as the other end, this time with a new draw bar.


Underneath, the commonwealth type centre castings have been fitted into place with temporary bolts.  The correct size bolts are being manufactured.


This is the nut and split pin that holds the draw bar in place.  Both ends have been removed, the rubber buffing pads checked and cleaned, prior to the draw gear being replaced.


Both brake cylinders and DA valves have been refurbished and re-fitted.


The front wooden nosing of both battery boxes have been replaced


This is a cradle which is being fabricated to hold a small generator.  This will be to power the equipment in the kitchen needed to satisfy current hygiene rules.